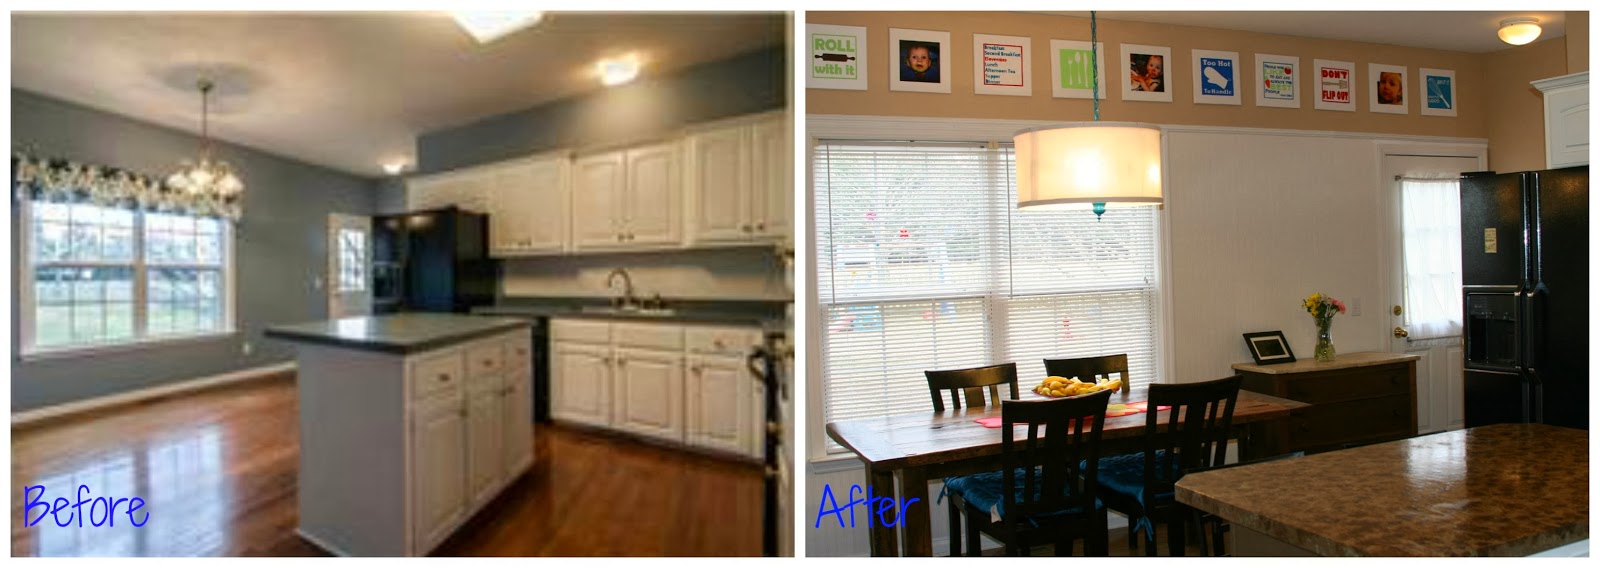
Aren't Before pictures so much fun?
So, I KNEW from the first moment I looked at our house that there was so much I could do with this kitchen. I knew I did't like the blue counter tops. They screamed early 90's, and well, that's just too old school for me ;) After living in the house for 6 months with the blue counters I also realized another reason I didn't care for hated those tops: THEY ALWAYS LOOKED DIRTY! Ahh! With a toddler (and a husband!) this just didn't jive with me. I never even looked into how much new counter tops would cost, I knew it would be out of my price range. So after a lot of research and reading and looking around I decided to try my hand at painting the counter tops.
I went to Lowe's with every intention for buying the Rust-Oleum counter top kit:
But, I just couldn't justify $250 even if it was waaaay cheaper than new ones. So I looked around and around (with a 2 year old in tow might I add....) and around some more. Then I settled on the Rust-Oleum paint made for counter tops. At $20 it seems considerably more reasonable. So, this is where the story of my new counter tops really begins.
I used the custom tint color "taupe." (how funny is it that one of the colors I could have picked was the very color I was trying to cover up! ha!). **Tip: Don't decide to do this on a whim when it's 20 degrees outside...this stuff STINKS! When my husband came home he opened every window in our house and the indoor temp quickly fell below 60. Please take my word for it and plan for this!**


I first cleaned the counters really well and then quickly went over them with some Deglosser (I had some leftover from when I painted the floors in my pantry -which you can read about
Here). I don't know if this step is necessary, but since I had it, I went ahead and used it. Using a foam roller I just lightly went over the whole surface. I ended up doing 3 light coats (and still had a 1/4 of the can left!) For the edges and corners I just used a cheap craft foam brush. The area around the sink was left since I knew I was getting a new sink installed. Once the old sink was removed I finished that area. Then after a LONG 3 day curing period I was able to finish up the painting.
There was lots of "testing" and opinion getting from my mom and sister before making final decisions. Even then it was a little nerve racking. But like my husband kept saying, "Anything's better than blue"...so I continued to march (did I ever mention I grew up an Army brat? =) ).
Let's never forget, I am cheap. So, when I need to paint my counter tops in the kitchen- the most used/seen room in the house- where do I turn for paint? My craft paint stash of course! All of the craft paint I used I already had on hand. I started with glitter. Yes, gold GLITTER. This was the scariest part, but also I think, the part that makes the biggest difference in the look and depth of the "granite" look I was going for. The second picture is a little hard to see, but I just used a waded up paper towel and made "veins" of gold. Not too much that it looks like an art project, but enough that it has some shine!
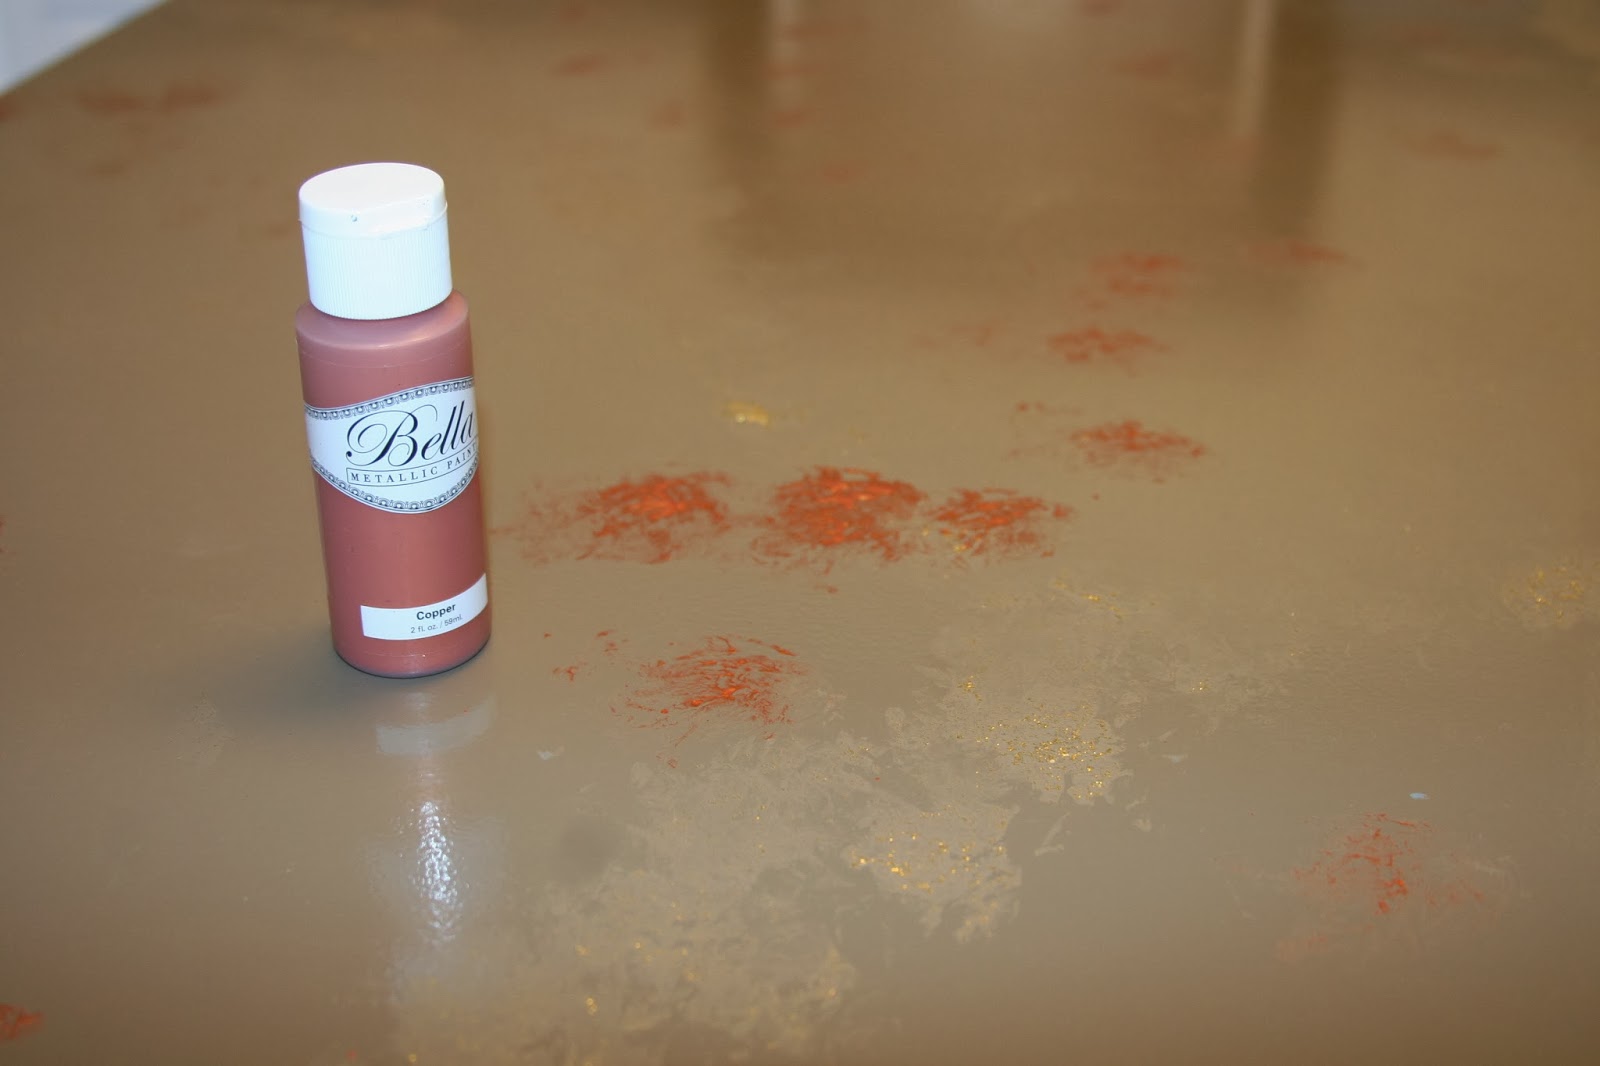
Next, I used a copper and a silver color. Again, go light on these colors! And as you can see at this step in the process I am FREAKing out thinking I have REALLY messed up and my husband is going to kill me! But I took a deep breath and kept going. At this point it can't get worse right?
So, I used a sample jar of paint from Lowe's and a sea sponge to do a "top coat" of color. I waned this color to neutralize all the shine and glitter under it. So I choose a color similar to the base coat. I used a paper towel for all the craft paints to get smaller spots of paint. The sea sponge however, was handy and made the process much faster for this part! At this stage I am feeling much better about what I've done. Something was still a little off. It hit me, I needed a small amount of dark brown to pull it all together.
Good pictures are really really hard to get, but here is a close up.
Now, the hardest part of this whole project. The clear coat. 1 can of this Minwax Polycrylic was $20ish at Lowe's and $16 at WalMart. I ended up buying 2 cans. I put like a million coats on the island and only 3-4 on the rest. I started with the island and got really tired and ready to be done by the time I got to the rest of the counter tops! I'm sure 3-6 coats would be fine. I just used a regular paint brush. It's difficult because the brush strokes are hard to hide. In the end, everything is so nice and shiny and sparkly! Yay!


Oh, and then there's the waiting and WORRYING that any little thing that touches your hard work will scrape it off and ruin EVERYTHING. The can of Polycrylic said to wait 24 hours (I think...) before normal use but I had too much time invested for them to get messed up, so the household patiently waited until I put the toaster and knife block back in their places as a sign that the counters were to be used again. It was a week or more before I felt comfortable really using the counters.
So, in the end it was totally worth doing! Total cost was about $60 (if I had to buy craft paint it would have been about five more dollars). I've now had the counter tops painted for several weeks and they've already been through it ALL! I have a toddler, remember?! And I've done all my cleaning with Clorox (or Lysol depending on what's on sale ;) ) wipes. Easy as pie. Oh, and they don't show every little bread crumb, BONUS!